
Fennel blush ferment
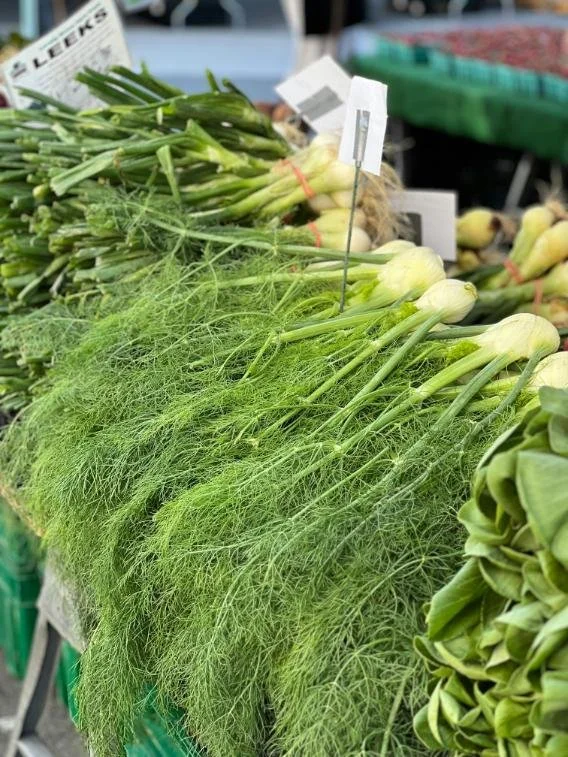
Fennel! Photo by Natalia S.
Is anyone else a fennel fanatic? Delicious vegetable, amazing herb AND highly effective herbal medicine. There are many ways to enjoy fennel, and one way is in this ferment.
Winter ferment recipes demand Winter vegetables and this one contains three vegetables; beetroot, fennel and red cabbage. I created this recipe for a World Ferment Day event that I ran with my partner-in-brine Caroline Gilmartin and the brilliant chef, Adam Goodfellow.
Beetroot is a nutrient powerhouse that I eat raw, roasted and as beet kvass. It is rich in relatively rare compounds called betacyanins. Fennel is a much loved vegetable for me, with its characteristic aniseed taste. It is delicious in salads, steamed and roasted. It is superb in ferments. The seeds are used as herbal medicine to help support the gut in a variety of ways, so I have added these in, too. Red cabbage is also a fantastic vegetable to eat raw, steamed, pickled or fermented. The pigments that make beetroot red are anthocyanins (different to those in beetroot). You need just 4 ingredients and 10 minutes to make this ferment.
Fennel blush ferment recipe
Ingredients
200g beetroot, washed thoroughly
400g fennel
400g red cabbage
Pinch of fennel seeds
Salt
Equipment
1 litre Kilner jar
Washed in hot water or that has been through the dishwasherA flat-ended rolling pin or equivalent (could be your fist) for pressing the vegetables into the Kilner jar.
A large mixing bowl
A set of scales
Method
Chopping
This recipe makes 1 kg of ferment.
Thoroughly wash the beetroot (or peel it).
Grate your beetroot.
Slice your fennel into thin strips. You can use the stalks and fronds, too.
Take off one of the outer leaves of the red cabbage, trying to keep it whole and set it to one side for later.
Cut a section of the cabbage core out for use later.
Dice the remaining 400 g of red cabbage.
Weighing
Put the empty mixing bowl onto the scales, then zero the scales so that you can weigh the total weight of all the prepared vegetables.
Put all the vegetables into the bowl on the scales as well as the fennel seeds.
And then make a note of the weight of the vegetables (excluding the weight of the bowl).
Salting
This volume of vegetables normally weighs around 1kg. For every 1kg of vegetables, we need 20g of salt – i.e. a ratio of 2%. So, if your vegetables weigh 900g, you will need to weigh out 18g of salt. The maths is simple – divide the weight of your vegetables by 100 and multiply that by 2 to give you the weight of the salt you need.
Weigh out the correct amount of salt into a separate bowl. Once weighed, pour the salt into the bowl of vegetables, roll up your sleeves and massage the salt into all the vegetables thoroughly.
Once you have done this, leave the bowl of salted vegetables to stand for ½ an hour or so. This enables the salt to draw out moisture from the vegetables with zero effort. And we need this moisture, as you will see in a minute.
Tamping
Once the vegetables have had their rest, you will be able to feel that they are softer and moist. If you squeeze some in your fist, moisture should now drip out between your fingers. If not, give the veg another good massage. Now, they are ready to be tamped.
Take your kilner jar and your flat ended rolling pin (or your fist). Cover the bottom of your kilner jar with a few handfuls of vegetables and then tamp them down gently, but firmly. The aim is to avoid bruising the vegetables, but to squeeze out any air from gaps between the veg.
Add the next few handfuls and repeat. The volume of the vegetables should reduce noticeably and, after a bit of tamping, you will see juices starting to ooze out as you press down with your tamper. This is what we need – the juices flowing. If there is a distinct lack of juices, the chances are you jumped the gun on the waiting time. And this means that you will need to work harder on the tamping phase to squeeze out the vegetable juices.
Keep going until the jar is almost full – you need a gap at the top to act as your bacteria buffer zone. When you push down on the vegetables, there should be a good amount of juices at the top of the jar. Whilst fermenting, our vegetables need to be below a seal of moisture so as to exclude air. The juices we have squeezed out of the vegetables form the “seal” at the top of the jar to keep oxygen away from our vegetables to, amongst other things, minimise mould growth.
Weighting
Sometimes, I will use the cabbage leaf and the cabbage core to stop the vegetables floating up through the juice seal and being exposed to air. To do this, you take the cabbage leaf that you set aside at the beginning, fold that whole cabbage leaf and wedge it down over the chopped veg.
Push the leaf down under the fluid level.
Then, take the cabbage core you reserved and put that on top. Close the kilner lid and, as you do so, it should press down on the ferment, which will push down on the cabbage leaf and help to hold all your developing ferment beneath its own fluid.
Having said all this, I rarely bother, because generally, the lactic acid bacteria acidify the process promptly, excluding the growth of any other microbes, even if a few bits of veg float up through the fluid at the top.
Waiting
Sit back and let the magic happen. Fermentation. There are a range of bacteria all over the vegetables, even if they have been washed. The salt reduces the levels of bacteria we don’t want to encourage. The lack of oxygen does the same. The bacteria that like salt and no oxygen dominate and produce acids – lactic acid, mainly. This is the perfect environment to allow the naturally-occurring lactic acid bacteria to dominate. They digest the sugars in the vegetables, produce lactic acid, which preserves the vegetables and, at the same time, produce all sorts of beneficial by-products. You will want to put your kilner jar on a saucer to catch any juices that will be forced out of the kilner during fermentation.
Burping
In the first few days, all we need to do is keep our fermenting ferment at normal room temperature. Initially, carbon dioxide is a by-product and these bubbles of gas can force fluid out of the kilner (hence putting it on a saucer to catch these juices). The carbon dioxide production slows after 2-3 days.
Tasting and eating
I normally leave my ferments at least 21 days, but you can start tasting from around 5 days. The veg is normally very crisp and crunchy. If it tastes good to you, put your ferment in the fridge (slows bacterial fermentation right down) and eat for lunch or dinner or sometimes even breakfast!
Glitches and hitches
If you have any questions or concerns about your ferment, consider signing up for a paid subscription to Substack, where I can answer any queries you have via the chat function.