
Rejoice the radish
Radishes are easy to grow. And easy to pop into your mouth straight from the ground. Delayed gratification is a challenge for me, but if you can resist eating your radishes long enough to make this ferment, you will be richly rewarded.
The radish is a member of the Brassica family. It has been cultivated for thousands of years for its edible taproot. It contains vitamin C, anthocyanins (beneficial for cardiovascular health) and glucosinolates. When we chew radishes (and when our microbes digest them) the glucosinolates are converted into various isothiocyanates (raphasatin, sulforaphene and sulforaphane) that influence cellular gene expression to upregulate antioxidant defences and liver detoxification processes. Radishes have numerous health benefits. And when we ferment them, they are not only transformed taste-wise, but we also get the benefit of all those lactic acid bacteria in addition.
And it is not only the root that is edible. Whilst young, small radish leaves are edible in salads. As they mature, the leaf texture changes and makes them less palatable. But you can still use them to make a vibrant pesto.
This ferment will fit into a 1 litre kilner jar or equivalent. Please remember that you can vary what you add to this recipe; you don’t have to put 2 chillis in if that is too strong for you. Feel free to experiment, just so long as you follow the basic safety rules; the proportion of salt to veg. you use (2%) and the exclusion of oxygen from the fermenting process.
Rejoice the radish ferment recipe
Ingredients
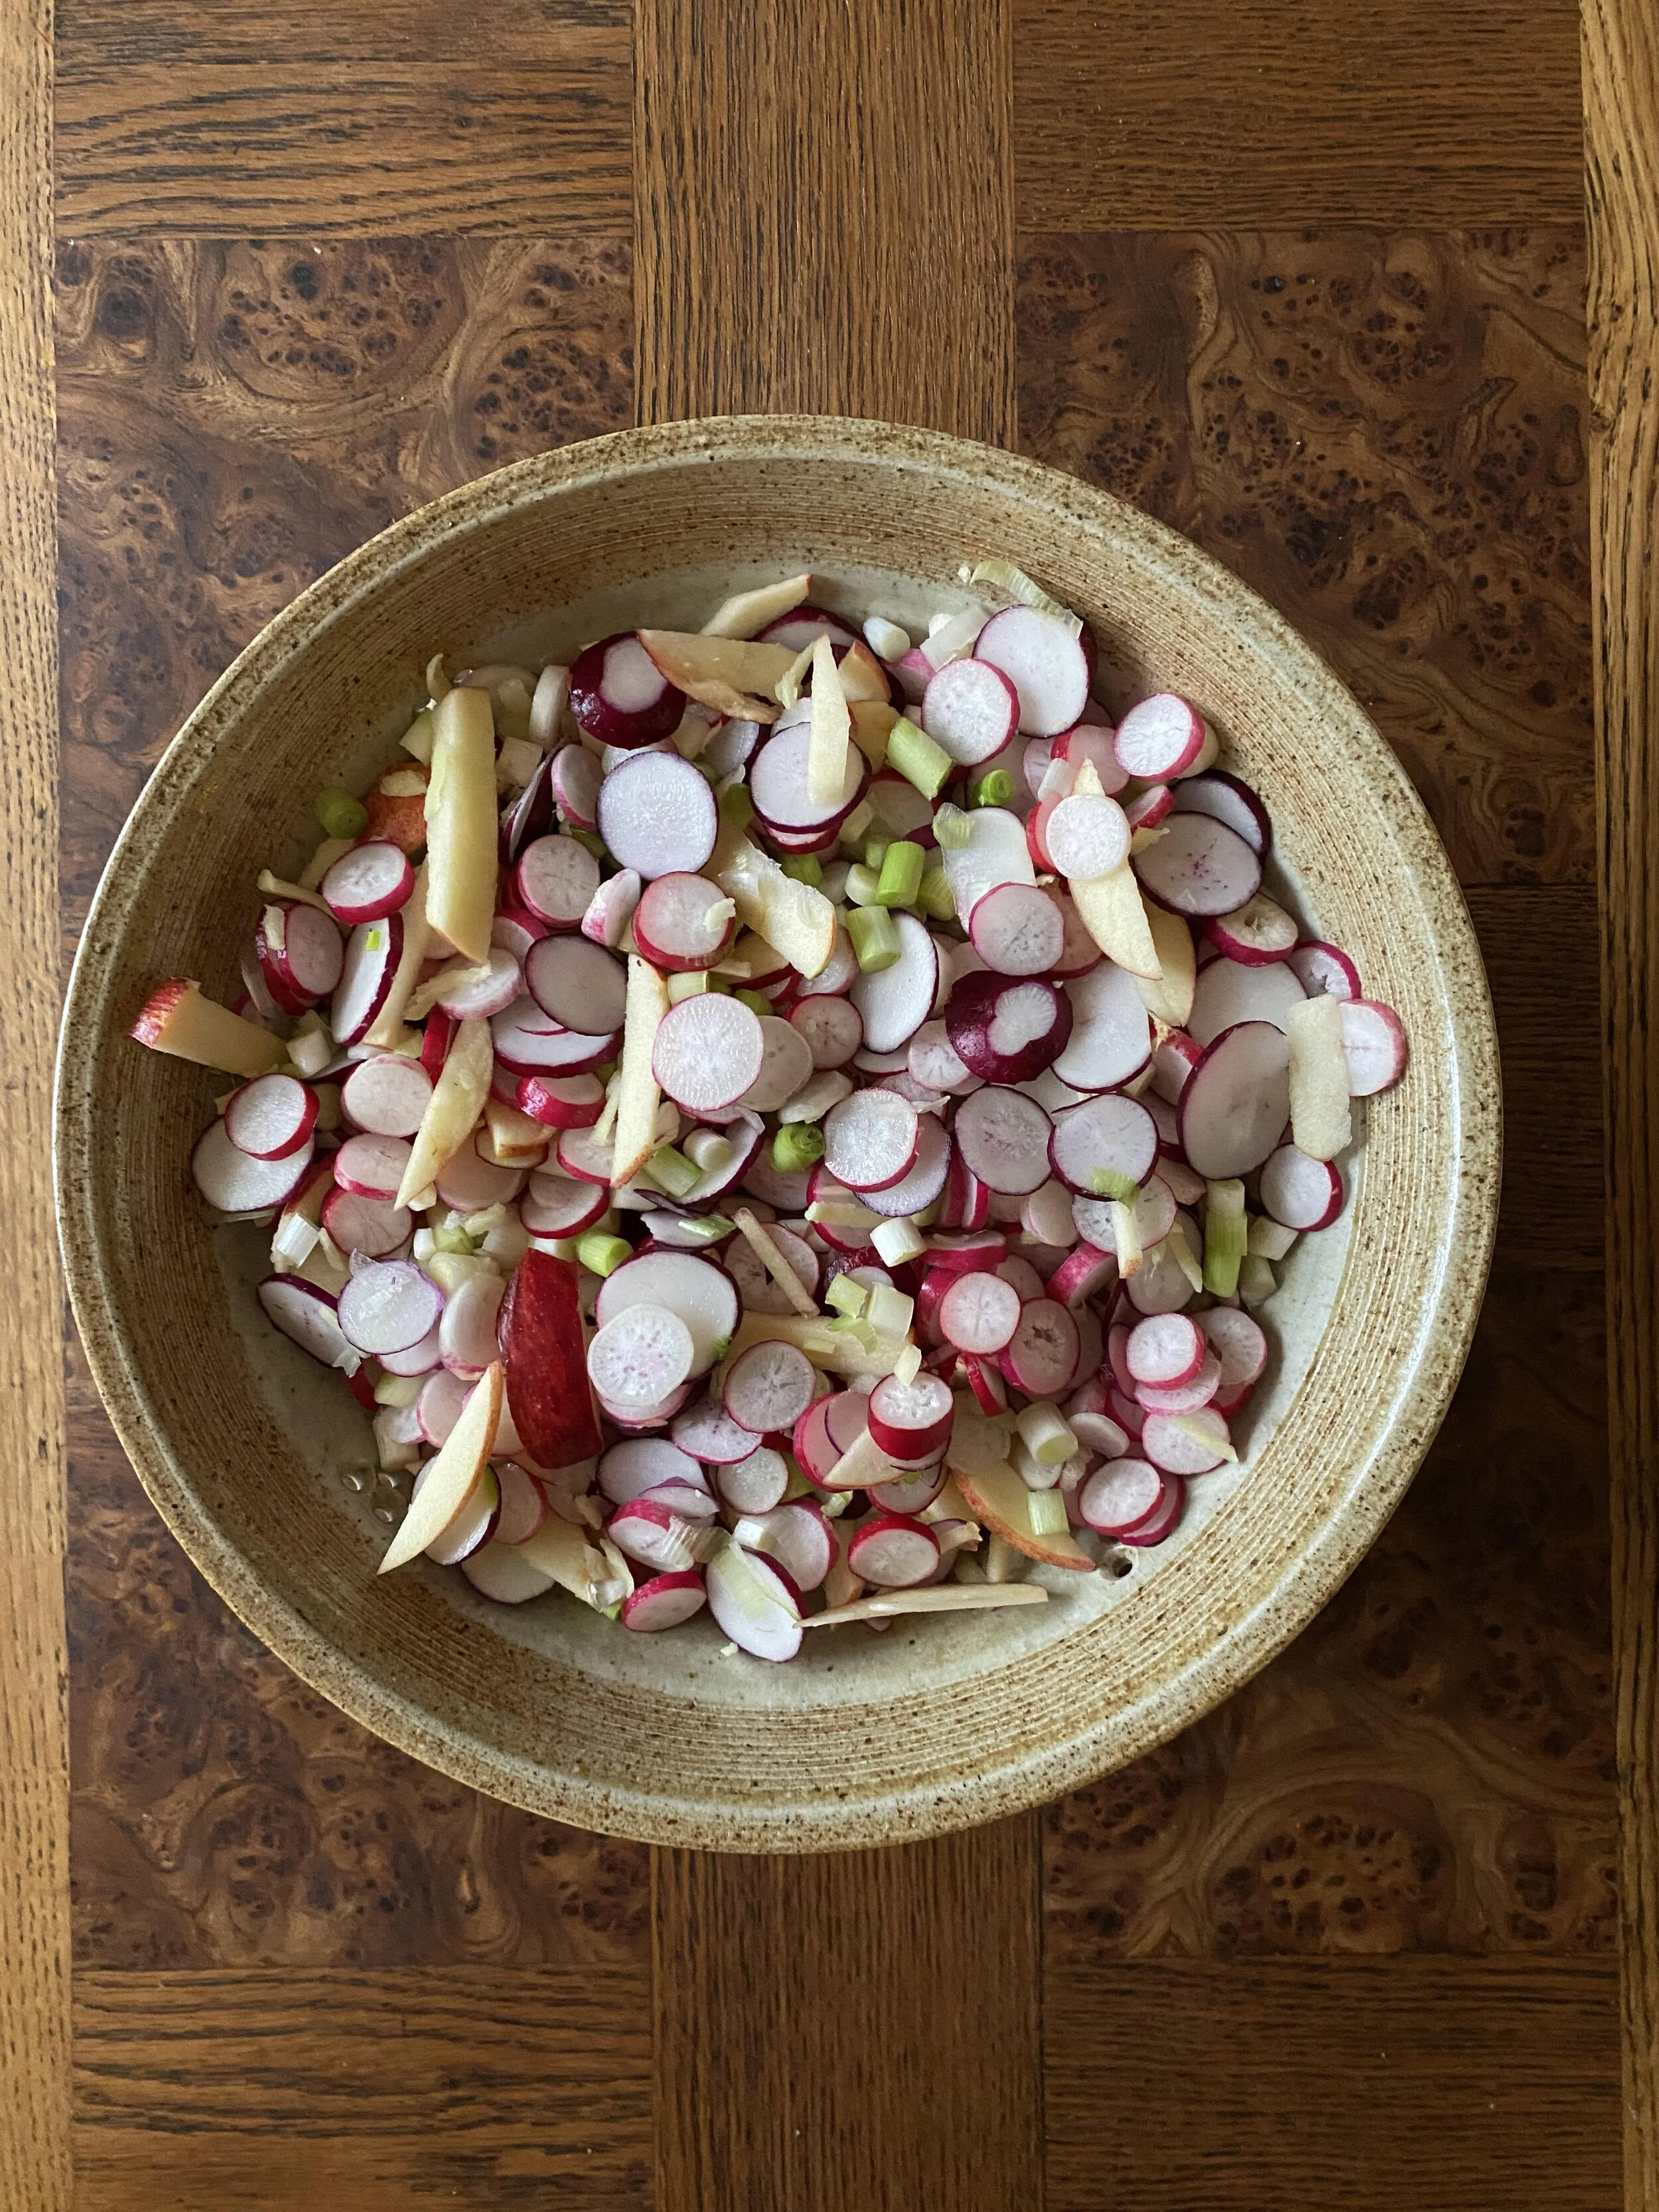
750g radishes, washed thoroughly
150g spring onions (4 bunches)
2 red chillis (I put the seeds in too)
2 apples, diced
2 tbsp grated ginger
Salt
Equipment
1 litre kilner jar
Washed in hot water or that has been through the dishwasherA flat-ended rolling pin or equivalent (could be your fist) for bashing the vegetables into the kilner jar
A large mixing bowl
A set of scales
A grater
Method
Chopping
Wash the radishes and slice them finely.
Do the same with the Spring onions.
Cut the chillis into tiny pieces.
Dice the apple.
Grate the ginger.
Weighing
Put the empty mixing bowl onto the scales, then zero the scales so that you can weigh the total weight of all the prepared vegetables.
Put all the vegetables into the bowl on the scales.
And then make a note of the weight of the vegetables (excluding the weight of the bowl).
Salting
This volume of vegetables normally weighs around 1kg. For every 1kg of vegetables, we need 20g of salt – i.e. a ratio of 2%. So, if your vegetables weigh 900g, you will need to weigh out 18g of salt. The maths is simple – divide the weight of your vegetables by 100 and multiply that by 2 to give you the weight of the salt you need.
Weigh out the correct amount of salt into a separate bowl. Once weighed, pour the salt into the bowl of vegetables, roll up your sleeves and massage the salt into all the vegetables thoroughly.
Once you have done this, leave the bowl of salted vegetables to stand for ½ an hour or an hour. This enables the salt to draw out moisture from the vegetables with zero effort from me. And we need this moisture, as you will see in a minute.
Tamping
Once the vegetables have had their rest, you will be able to feel that they are softer and moist. If you squeeze some in your fist, moisture should now drip out between your fingers. If not, give the veg another good massage. Now, they are ready to be tamped.
Take your kilner jar and your flat ended rolling pin (or your fist). Cover the bottom of your kilner jar with a few handfuls of vegetables and then tamp them down.
Add the next few handfuls and repeat. The volume of the vegetables should reduce noticeably and, after a bit of tamping, you will see juices starting to ooze out as you press down with your tamper. This is what we need – the juices flowing. If there is a distinct lack of juices, the chances are you jumped the gun on the waiting time. And this means that you will need to work harder on the tamping phase to squeeze out the vegetable juices.
Keep going until the jar is almost full – you need a gap at the top to act as your bacteria buffer zone. When you push down on the vegetables, there should be a good amount of juices at the top of the jar. These juices are key. Whilst fermenting, our vegetables need to be below a seal of moisture so as to exclude air. The juices we have squeezed out of the vegetables form the “seal” at the top of the jar to keep oxygen away from our vegetables to, amongst other things, minimise mould growth.
Weighting
Sometimes, I will use a cabbage leaf and a chunk of broccoli stalk (or cabbage heart) to stop the vegetables floating up through the juice seal and being exposed to air. To do this, you steal a cabbage leaf, fold that whole cabbage leaf and wedge it down over the chopped veg.
Push the leaf down under the fluid level.
Then, take the chunk of broccoli stalk/cabbage heart and put that on top. Close the kilner lid and, as you do so, it should press down on the broccoli stalk/cabbage heart, which will push down on the cabbage leaf and help to hold all your developing ferment beneath its own fluid.
Having said all this, I rarely bother, because generally, the lactic acid bacteria acidify the process promptly, excluding the growth of any other microbes, even if a few bits of veg float up through the fluid at the top.
Waiting
Sit back and let the magic happen. Fermentation. There are a range of bacteria all over the vegetables, even if they have been washed. The salt reduces the levels of bacteria we don’t want to encourage. The lack of oxygen does the same. The bacteria that like salt and no oxygen dominate and produce acids – acetic acid and lactic acid, mainly. This is the perfect environment to allow the naturally-occurring lactic acid-producing Lactobacillus genus to dominate. They digest the sugars in the vegetables, produce lactic acid, which preserves the vegetables and, at the same time, produce all sorts of beneficial by-products in so doing, including B vitamins. You will want to put your kilner jar on a saucer to catch any juices that will be forced out of the kilner during fermentation.
Burping
In the first few days, all we need to do is keep our fermenting ferment at normal room temperature. Initially, carbon dioxide is a by-product and these bubbles of gas can force fluid out of the kilner (hence putting it on a saucer to catch these juices). The carbon dioxide production slows after 2-3 days.
Tasting and eating
I normally leave my ferments at least 21 days, but you can start tasting from around 5 days. The veg is normally very crisp and crunchy. If it tastes good to me, I move my ferment to the fridge (slows bacterial fermentation right down) and eat for lunch or dinner or sometimes even breakfast.
Glitches and hitches
If you have any questions or concerns about your ferment, consider signing up for a paid subscription to Substack, where I can answer any queries you have via the chat function.